Do you dream of scripting the next blockbuster? Proper formatting will increase your manuscript’s chance of being considered. In our threepart series, learn why the Hollywood standard exists, how to adapt an export style’s settings accordingly, and how to eventually create a compliant script.
Most successful screenwriters will tell you that proper formatting, what’s often referred to as the “Hollywood standard”, is an essential part of getting your script read and circulated inside a studio or an agent’s office.
Formatting for a screenplay is something like a dress code for aspiring screenwriters. It might seem trivial, but without it your work is all the more likely to find its way into the recycling bin before it’s even read.
While there are a number of dedicated screenwriting apps on the market designed to help you address formatting in a screenplay, Ulysses’ Markdown tags combined with the ULSS style sheets provide everything you need to control the elements of screenplay formatting quickly and intuitively from within your writing environment.
The Importance of Proper Formatting
Formatting a screenplay is complicated because of the many aspects involved in the actual production of a movie or TV show.
The whole idea of a “Hollywood standard” originates from the need to coordinate actors, directors, and cameramen, not to mention the elements of post-production which include titles and credits, and camera transitions.
The screenplay serves as the keystone for keeping the elements of production in sync, but it has to be written in advance, outside of the context of its production.
What this means for writers is that we follow a format designed to anticipate the process of filming. Industry standards encourage writers to think in terms of the bigger picture, making the script a vehicle for presenting a story to industry professionals who are weighing movie ideas with real-world concerns, namely time and money. Proper formatting helps professionals get a sense of how the story works from the perspective of production, so it’s important to follow certain guidelines and maintain consistency when submitting a script in a professional context.
For these purposes, we have created a new style sheet, Filmscript (Hollywood Standard), that adapts the original Filmscript style to match the elements of a standard spec script. Here, I’ll walk you through these elements and provide you with the tools to not only produce a professional script, but to customize the Filmscript style sheet yourself so you can adapt the format to whatever situation might arise.
Over the course of these three posts for customizing the Filmscript style sheet, we’ll learn to customize a number of settings that will be useful for other kinds of documents. We’ll cover, for example, how to use headings to set multiple margins, how to adjust fonts and font colors, and how to create special paragraph settings that automatically follow a particular heading, all of which are potentially useful tools in a variety of export formats.
Customizing Document Settings
Let’s begin by looking at the Filmscript style so we can better understand how the style sheet manages the elements of a screenplay format.
To begin customizing Filmscript, download it from the style library on the Ulysses website, and open it with Ulysses.
Next open TextEdit inside your Mac and disable “Smart Quotes”. Other CSS editors such as TextMate and Sublime Text (if you like colored highlighting) also work well. Then open Ulysses’ Preferences from the Ulysses menu and highlight the Styles tab on the far right.
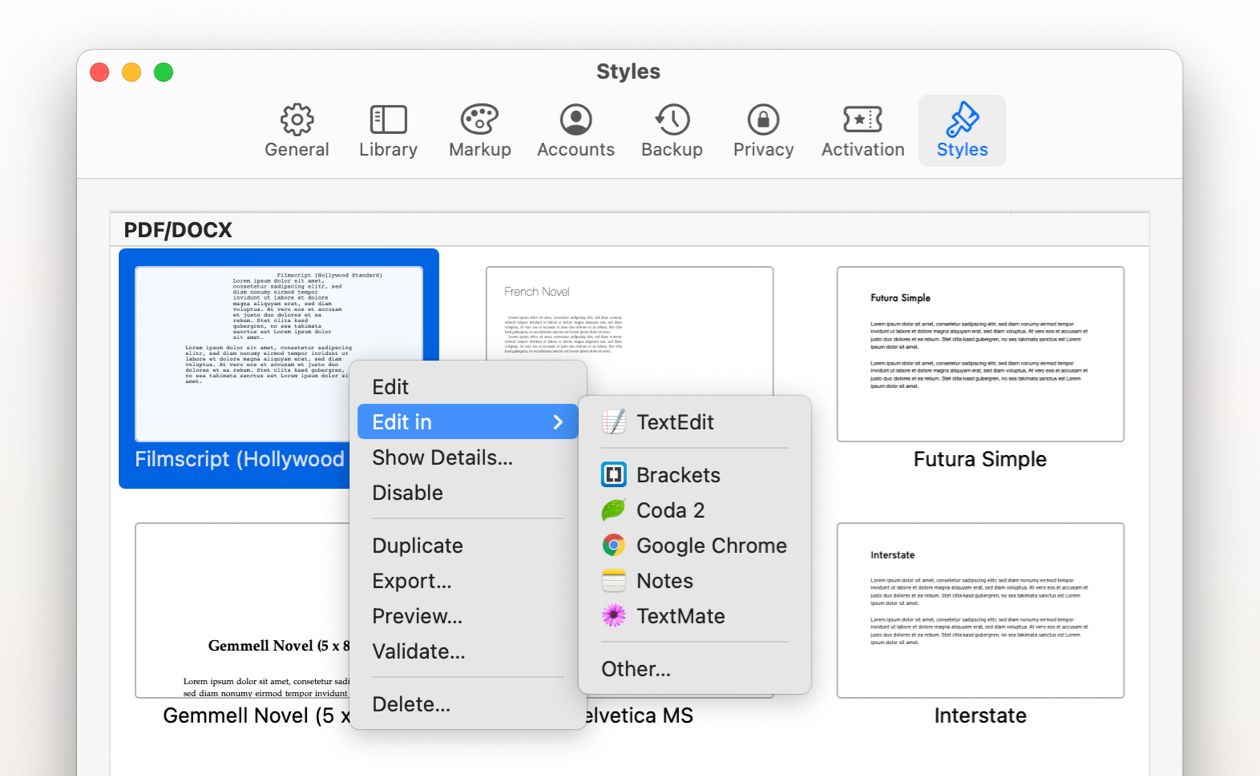
- Right click on the Filmscript style and select Duplicate.
- Then, right click on the duplicate (marked “copy”) and select the “Edit in” option.
- A dropdown menu will appear. Select an editor from the dropdown menu and the style sheet will open automatically in the editor.
- Don’t forget to save the new style. You can of course also give it another name.
Style sheets are the part of Ulysses that translates your markdown tags into elements of style when you export your work to create a finished document. They control everything from fonts and subheadings to overall page size and margins, and they can be customized to suit your specific needs.
Looking under the “Document & Layout Settings” section in Filmscript, you’ll see that Filmscript has these parameters set correctly, with the page at 8.5 x 11 in. and the font set to 12 pt. Courier. Everything in a screenplay is structured so that a page translates as closely as possible to a minute of screen time. So, these basic layout elements are important because something like choosing a different font can change the number of lines that appear on a page. The rule of thumb is that you need about six lines per inch and about 55 lines per page.
Moving down the page in Filmscript, we find our first trouble spot, which is the overall page margin setting.
The biggest difference between Filmscript and the industry standard format is in the page margins. The original Filmscript style doesn’t adjust for left-side binding, and it’s customary in the movie industry that spec scripts are bound with hole-punches on the left side.
This is an easy fix, we just need to change the settings for page-inset-inner and page-inset-outer from .5 inches to 1.5 inches and 1 inch respectively.
So this,

becomes this

Now the page margins are set to the conventional one-inch width, with an extra half-inch on the left margin for binding.
Scrolling down to the headings section, you’ll notice that heading-1 and heading-2 have been color coded. While this might be useful in special circumstances, in most cases, and particularly if you are submitting an unsolicited spec script to an agent or studio, you’ll want to use the standard black color.
Instead of removing the color codes completely, I’ll just add the code for black in with the red and blue under the section titled “Colors” in case you want to use the red and blue for other purposes. So this,

becomes this,

Then simply change the elements inside headings one and two where these settings are called. To do this, find font-color under heading-1 and change $blue to $black, and under heading-2 change $red to $black.
That brings our general settings into alignment with the industry standard. In the next post we’ll explore how to further customize Filmscript to properly align the margins for elements such as dialogue, action, and transitions.