In the third and last part of our blog series, you’ll learn what the title page of an industry standard screenplay should look like, how to create one with Ulysses, and how to finalize your script for submission.
There are several reasons you might need to control the location of titles on a page: a teacher might require the title of a paper to be placed at a certain location on the first page, or you might be submitting a larger manuscript that requires a title page separate from the main text.
In any case, controlling the location of your title can be accomplished in Ulysses using some fairly straightforward customization techniques that can be applied to any style sheet.
The Hollywood Standard Title Page
As the last post in our series for formatting a “Hollywood Standard” screenplay, we’ll use the title page of a movie script as an example.
Hollywood standard for a spec script requires a separate title page included on top of the script, before your script starts. In other words, like the cover of a book, the title page is the first page of the screenplay, but it doesn’t count in the page numbering with the rest of the script.
For this reason, you’ll need create the title page as a separate document inside Ulysses and then combine it with your script using Apple Preview to keep your pagination in the correct order. We’ll cover this procedure in a moment, but first let’s look at the elements of a title page.
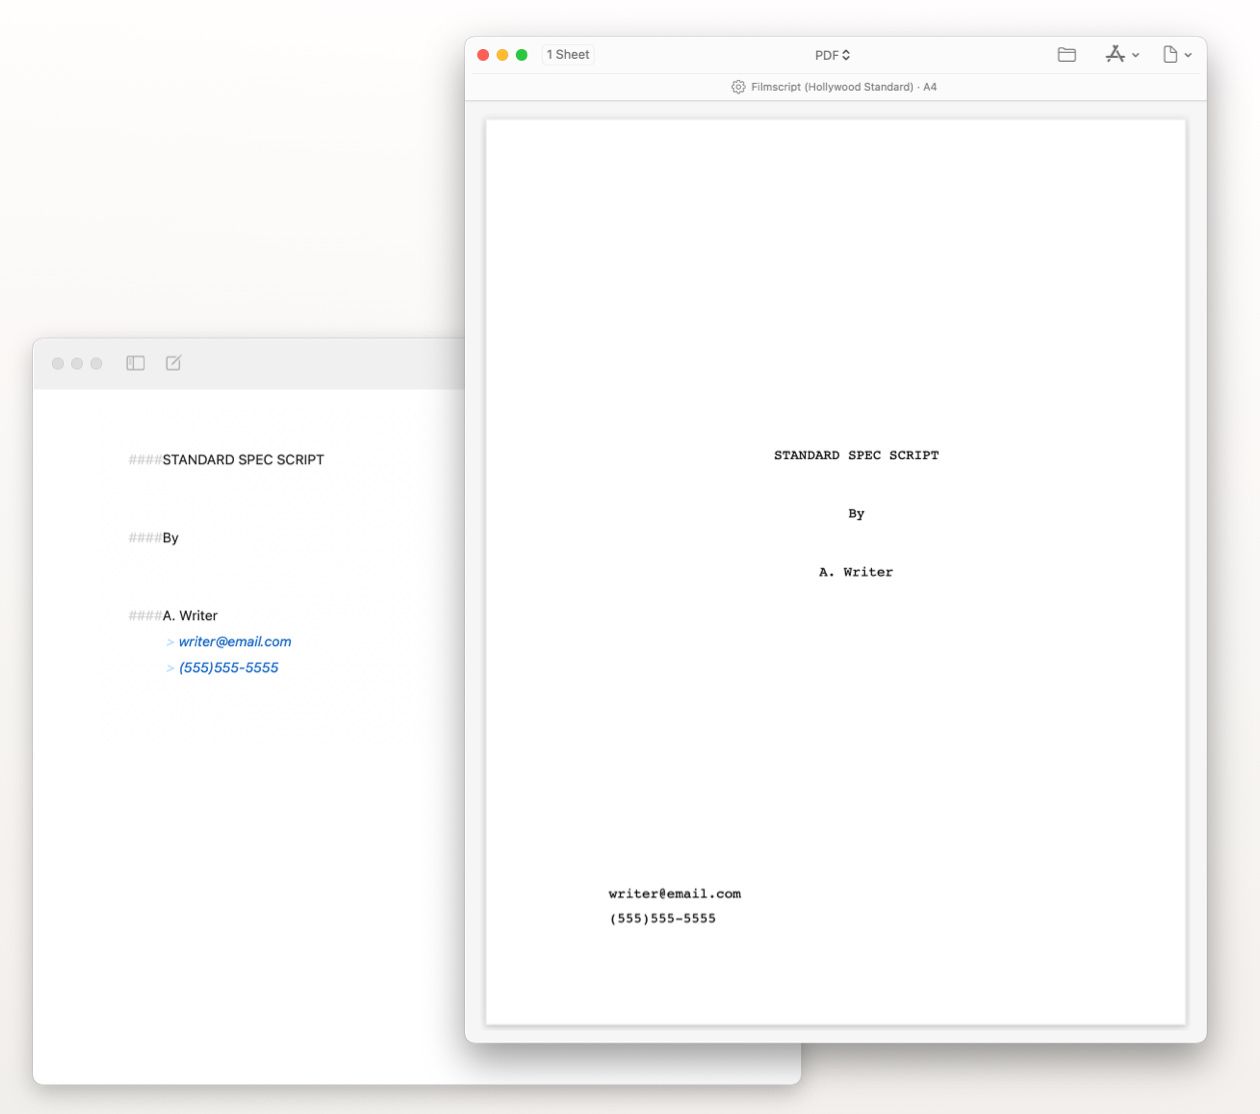
The requirements for a title page for a standard spec script are simple. The font should be set to Courier 12 point. It should start with the title centered between the left and right margins and 4 inches down the page (3 inches below the top margin). Only the title should be in all capital letters, and you can choose either to underline it or not.
The title is followed by a two or three line white space before the word “By” and then another two or three spaces followed by the writer’s name. All of these elements should be centered between the left and right margin, and only the first letter of individual words should be capitalized.
The only other feature is the contact information, which belongs in the bottom left corner. If you have an agent, the name, address, phone number, and email go here. Or if you are currently un-represented, your phone number and email address will be sufficient.
Many writers, both aspiring and working inside the industry, add elements of customization to title pages. The most common is to list a draft number or other information about the particular version of the script. But, unless you have a specific request from inside a studio or agency, this kind of notation (while fine for your personal archives) should not be included when submitting a spec script. Also off the table are font variations, graphics, or any other cover art that you might be tempted to use.
For most spec scripts, the title page should be plain and simple. All a script reader or a producer wants to see is the title, the writer’s name, and contact information, all in 12 point Courier font.
Making the Adjustments
So, how do we get the title in the center of the page?
We’re going to approach this by adjusting the top margin for the particular heading that we’re using for the title.
Again, start by opening the Filmscript style sheet in an editor using the procedure from the first article.
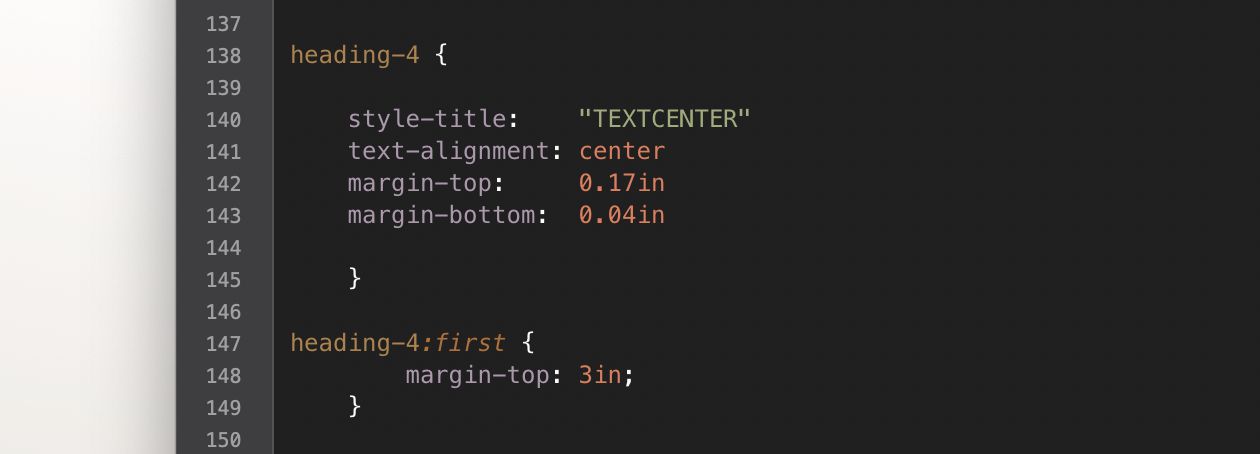
Once you have Filmscript open, scroll down inside the style sheet to the section marked “Headers”. In the case of the Filmscript (Hollywood Standard) style, we’ll be working with Heading 4 (####), which already has settings for text centered between the left and right margins. We’ll add a separate top margin of 3 inches that will apply only to the first use of Heading 4.
Under “Heading 4” (####), this
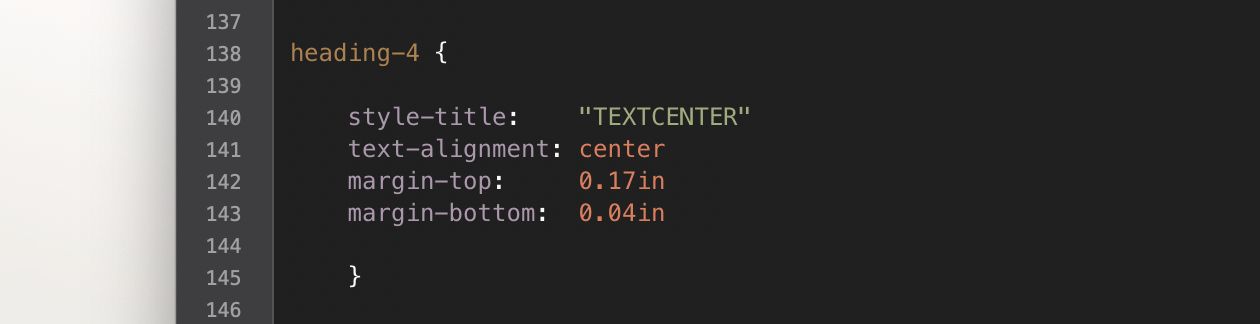
should now look like this
For the white space underneath the title you’ll need to add line breaks in Ulysses which you can do with the shortcut ⇧⏎ (shift-return).
In the case of a screenplay, we don’t need to use a perfectly centered line anywhere else in the document, but in case you’re formatting a novel or another long manuscript and you want to use this heading in locations other than the title page, you can use the command “first” to apply the top margin setting only to the first instance of the heading as shown in the image.
For the contact information section, we’ll create a special setting for a block quote that applies only when a block quote follows Heading 4. To accomplish this, the following code has been added at the end of the “Headers” section.

Finalizing Your Document
With your contact information filled out and properly placed, your title page is now ready to export. Click on the share icon at the top of your Ulysses window, select Filmscript (Hollywood Standard) from the style dropdown menu, and select US Letter for paper size. Then click the folder icon to export to folder on your desktop and save both files there.
When you’re ready to create the final version of your screenplay, open the main part of your screenplay in Apple Preview and drag and drop the title page into its proper position at the front of the Preview document. It will automatically be combined into the screenplay. Save your Preview document, and your script is ready to be sent out.