
Welcome to the second part of our blog series! Today, you’ll learn about the use of margins and page numbers in screenplay formatting, and how to adjust these settings in an export style.
Beyond basic page settings, formatting a screenplay involves a fairly intricate system of margin settings that place the elements of a script, the action, dialogue, transitions, etc., in predictable locations on the page.
In the early days of cinema, this was accomplished by setting multiple tabs on a typewriter. Even as technology has advanced, the process is still rather technical in writing software such as Microsoft Word or Apple Pages, which mimic the tab structure used with mechanical typesets.
These days, dedicated screenwriting apps try to do much of this work for you, and charge a premium for that convenience. But even in these dedicated screenwriting apps, certain issues are commonplace. When an app tries to guess your next move, for instance, but guesses wrong, you might find yourself having to use the touchscreen to select from a scroll down menu to get to the next setting — definitely an interruption to the writing flow.
In Ulysses, we can accomplish the essential function of moving quickly between formatting elements from within the writing environment by using markup tags. Rather than relying on the app to plot the course for you, Ulysses’ tags can give you that same agility using only a few quick keystrokes, making formatting effortless as you write, but also giving you more direct control over the implementation of these settings.
Setting Margins
To begin, let’s again open the Filmscript style sheet in an editor using the procedure from the first article.
Once you have Filmscript open, scroll down inside the style sheet to the section marked “Headers”.
Here you’ll find settings for the six headings common to all Ulysses styles which are called in your writing sheet using a corresponding number of hashtags (#,##,### …). When you export your document, these settings are translated into your final document.
In the first article, we adjusted the overall document settings to bring them inline with the Hollywood standard. Because the settings for headers are additive in CSS and ULSS, that adjustment will affect the margins set using these headers, so we’ll need to compensate for the differences. We’ll be using some new settings as well in order to bring Filmscript into alignment with industry standards based on the recommendations found at storysense.com.
Below, you’ll find a sample screenplay page that contains the essential elements of a spec script. We’ll use this as a reference as we work through the adjustments to Filmscript so you can see how the final document should look with proper screenplay formatting.
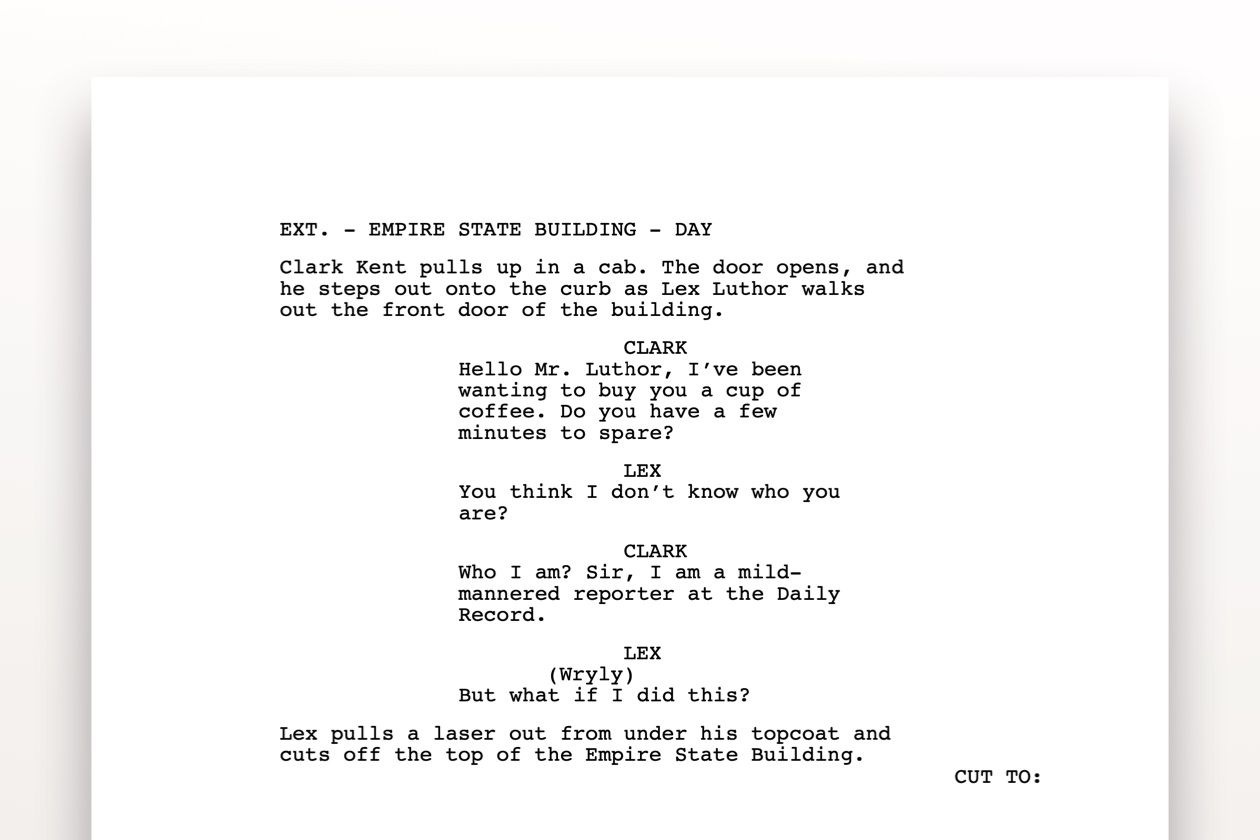
At the top of the sample screenplay page, you’ll find a scene heading or a slug line. This is a single line set on the left margin indicating interior or exterior (INT. or EXT.), along with a brief description of the scene setting and the time of day (usually either “DAY” or “NIGHT”, but more specific descriptors such as “DAWN” and “DUSK” are also fine).
Using the Filmscript style, this setting is entered with two hashtags (##), and it can start on any line of the page, with the exception that you should remember not to start a new scene on the last two lines of a page. Open the export preview next to your editor to compare your individual pages. If you find a scene starting at the bottom of a page, you can use the divider tag, four consecutive dashes ----) on an empty line, to skip ahead to the next page.
The next element is for action, also referred to as description. Either term is apt. A character appears in the scene and does something, something happens that moves the story forward, or details are given describing character and/or place. Paragraphs in this element are where you do most of your storytelling and set up lines of dialogue. Filmscript uses the default paragraph setting for action, so we don’t need to use any tags or make any adjustments.
In the action of our sample script, a second character enters and the main character speaks to him, beginning a chain of dialogue.
Dialogue appears near the center of the page, usually just off-center to the right. It has two primary elements, a character cue telling us which character is speaking, followed by the line (or lines) spoken.
Character cues are entered in Filmscript using a single hashtag (#). In the “Hollywood Standard” version of Filmscript, I’ve adjusted the margin to 2.7 inches inside the left margin.
Immediately following the name of the character is the spoken dialogue, which is also set in the center-right part of the page. Filmscript uses a special paragraph setting (@dialogue) that is called automatically following a character cue. Effectively, the single hashtag command #) calls both the line with the character name and the paragraph settings for the dialogue that follows.
We’ll need to adjust this @dialogue setting to bring it into format. It’s found in the Filmscript style sheet in the section just below the headers titled “Paragraph Styles”.
Here, I’ve changed this:

to this:

You’ll notice I’ve included a line in parenthesis in one of Lex Luthor’s paragraphs. These “parentheticals” (also known as “wrylies”) are short, usually one-word, descriptors for how a line is to be delivered. Generally, the reader should be able to “get” the mood of a line simply from its context, so the use of parentheticals is discouraged. However, like transitions they can be used when necessary, and they are called in Filmscript using three hashtags (###).
The last element is the “CUT TO:” phrase in the bottom right of the page. This is a camera or production direction that describes the kind of transition to be used as the story moves to the next scene.
Transitions belong on the far right of the page, both versions of Filmscript use a right justified margin setting, and they are entered using five hashtags (#####).
The rule of thumb with transitions is that it’s fine to use them when they seem necessary or helpful to the reader. You might want to use them to emphasize important plot points, for instance. But since they reference production techniques, producers generally don’t want to see them used heavily in a spec script.
The exception to this rule is the opening of a script. Every script still begins with a camera direction, “FADE IN:”, and since the “FADE IN:” transition leads the reader into a scene rather than closing a scene, it belongs on the left margin. In Filmscript, simply using the default paragraph settings (the same one used for action) is suitable.
Including Page Numbers
The last thing to take into account in the sample page is the page numbers. This is another point where the industry standard is a little quirky, but it’s also an element that will help the readers who are considering your work, and annoy them if they are missing.
Standard formatting requires the pagination to begin on the second page of the script, which is actually the third page of the document if you include the title page (which is also required).
We’ll cover the elements of the title page in a third article, for now, we need to make sure that the page numbers are located properly in the top right margin, and that they start with the second page of the script itself.
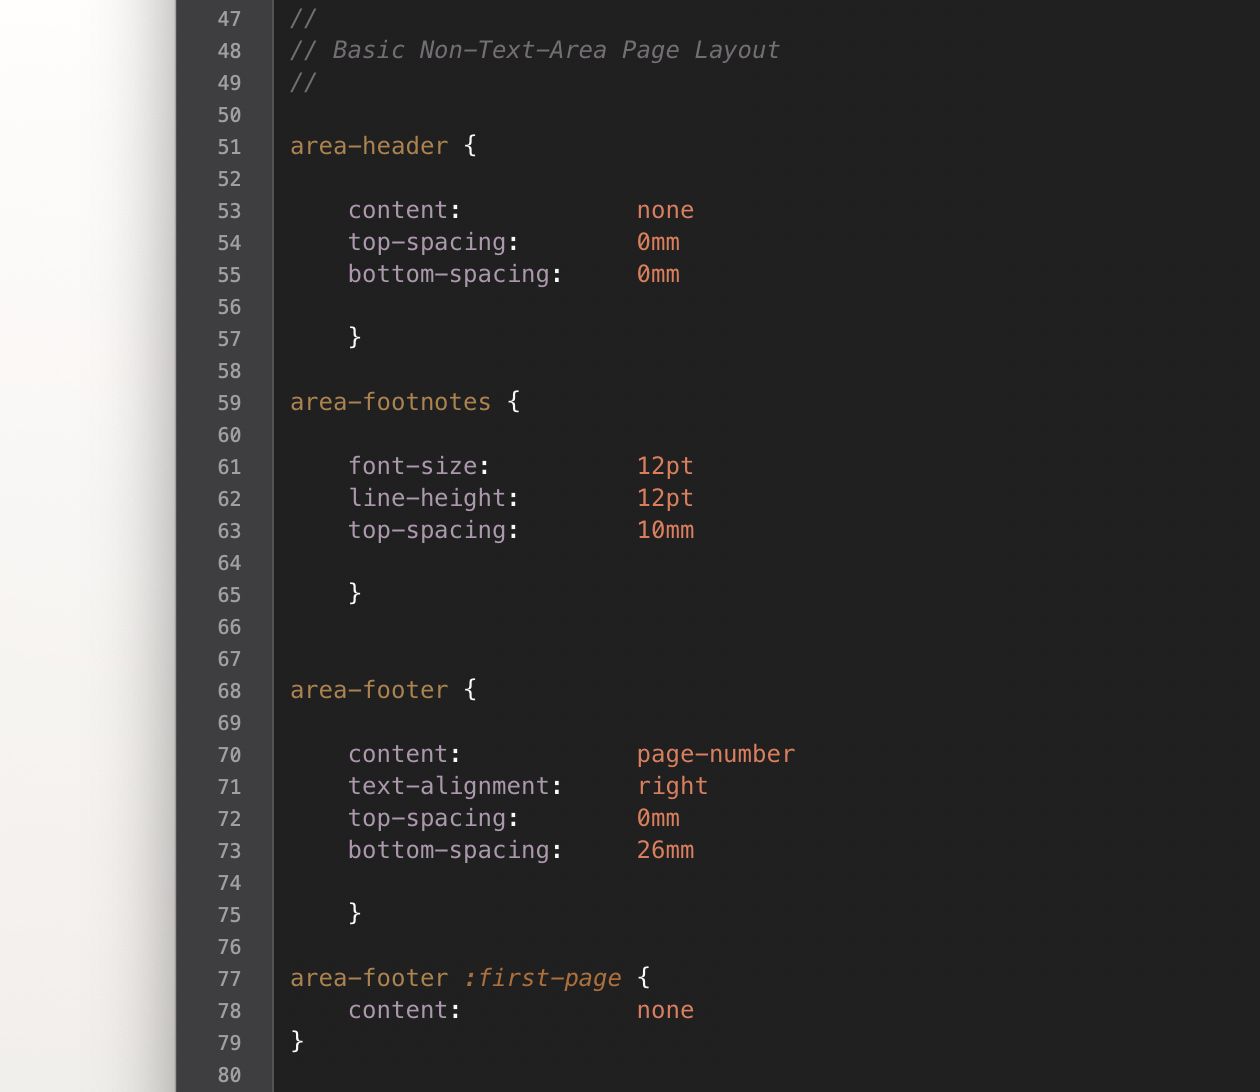
Filmscript is already set to have page numbers start on the second page, but the location is in the bottom right corner instead of the top, where your readers will expect them. So we’ll need to make one final adjustment here, under the section titled “Basic Non-Text Area Page Layout”, and we’ll change this entire section.
So this,
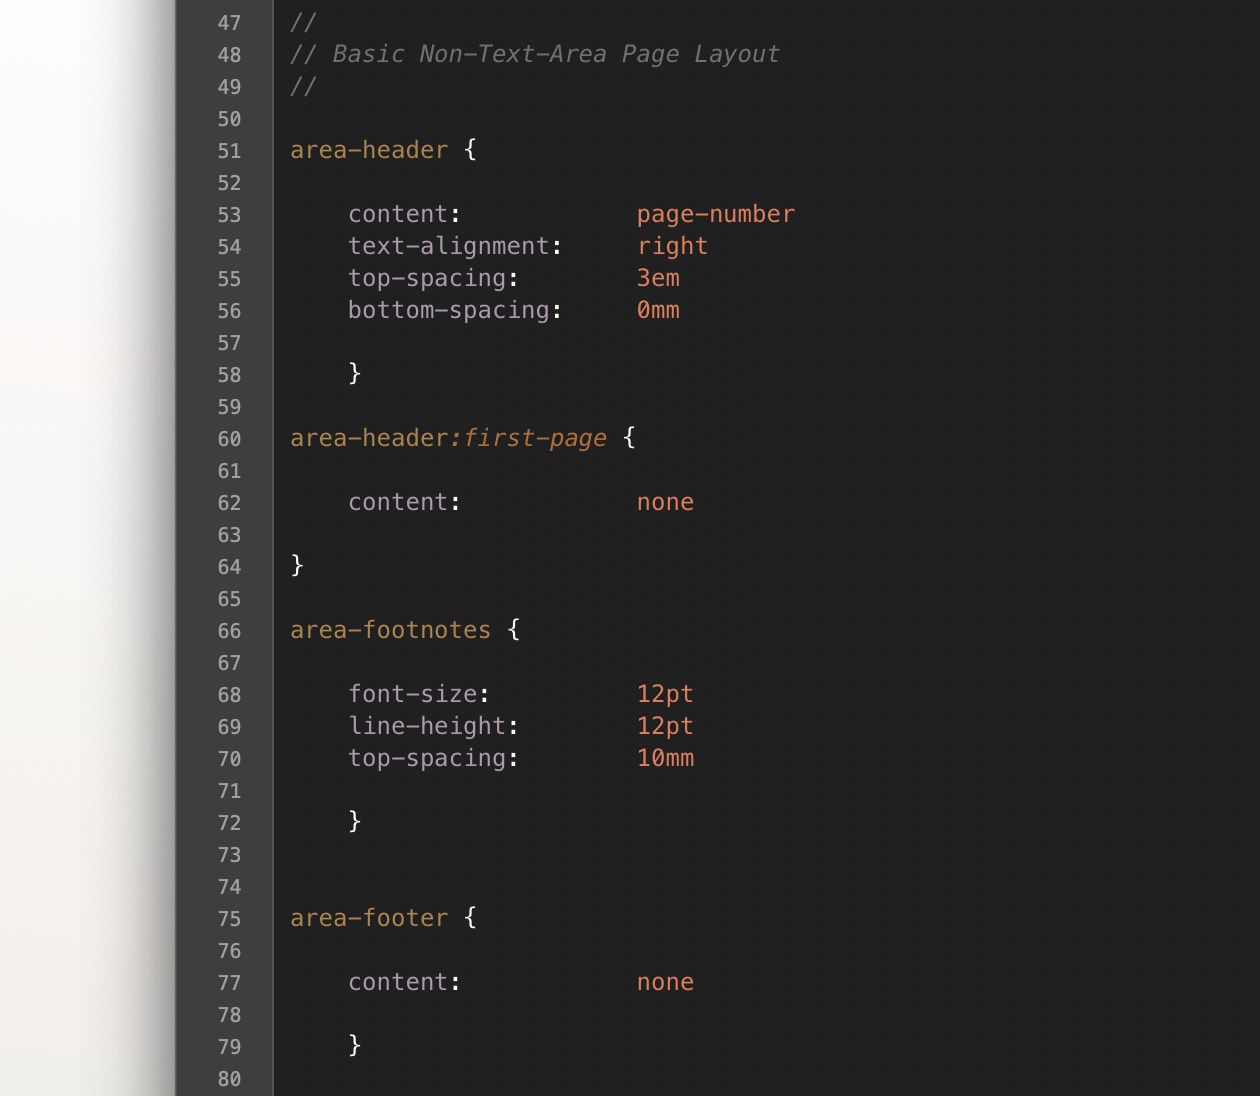
should now look like this.
That covers the elements of formatting a screenplay by customizing the Filmscript style. We have included a new version of the style, Filmscript (Hollywood Standard), developed for this article in the Ulysses Styles & Themes website, and you should also now have the tools for performing your own customizations. While you’ll find slight variations amongst reputable sources for recommended margin settings, it’s important for your script formatting to be consistent and to anticipate the expectations and objectives of the professionals who will read your work.