Ghost is a minimalist platform that focuses on professional publishing. At Ulysses, we’ve been using Ghost since March 2020 to power our company blog. Searching for a (new) home for your blog? Find out what makes Ghost special.
Rather than aiming to be an all-purpose content management system for websites of all kinds, the people at Ghost see themselves on a special mission: they promise to create open-source tools for independent journalists and writers across the world. One particularly great thing about Ghost is the very neat and clutter-free interface, meaning no suffering through clumsy toolbars.
Just like in Ulysses, each button or menu option in Ghost is there for a reason. And (again, just like in Ulysses), one shouldn’t misinterpret the minimalist interface as a lack of features. Ghost can be quite powerful, but only if needed. So if you tend to feel overwhelmed by blogging systems that offer almost too many options and tools, Ghost might be just perfect for you.
Getting Started: The Set-up
Getting started with Ghost is rather easy. To set up a new blog, Ghost requires you to enter an email address and a password, as well as credit card details (you’ll of course only be charged after you’ve selected a plan). Next, you can choose whether you’re a creator, a marketer, or a developer in order for Ghost to provide a personalized setup. After selecting a publication name, Ghost will set up your new blog. The entire process only takes a couple of minutes.
Once your new blog is ready, you’ll be greeted by your personal dashboard:
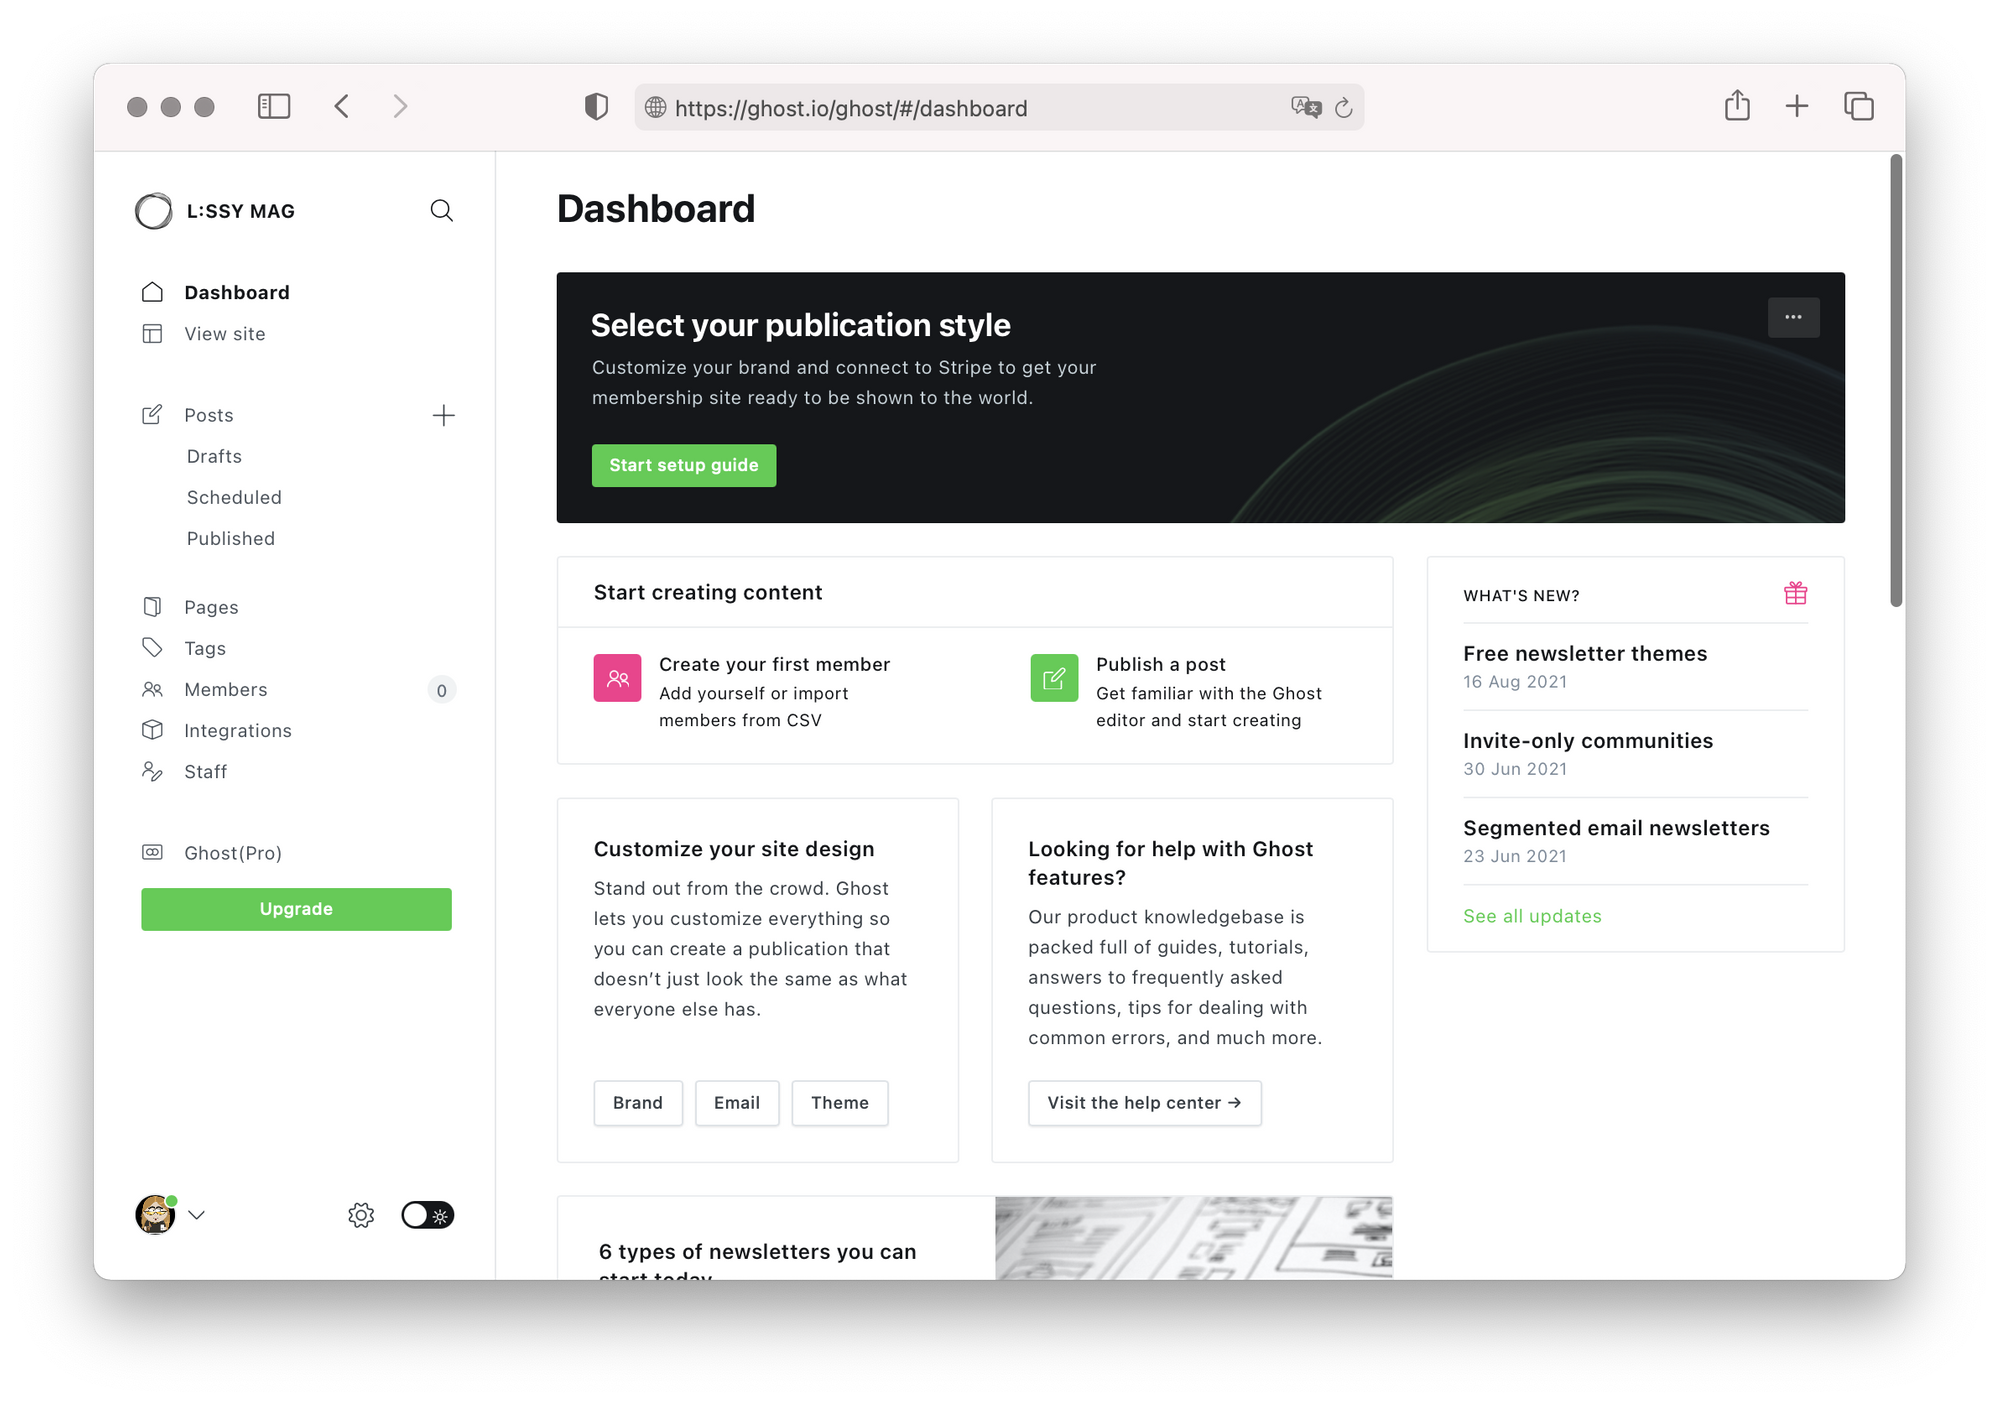
Here, you can manage everything about your blog: write and publish new posts, create pages, or add tags. If you’re planning to run the blog with other collaborators, you can manage your site’s staff from the dashboard. You can connect your favorite tools and apps to your blog via the Integrations section, or add what Ghost calls “members” — we’ll come back to that in a second. By default, your new blog will use Ghost’s standard theme called Casper. However, you can also install a new theme, or completely customize the look of your new blog.
Earning Money With Ghost’s Members Feature
Planning to earn an income by blogging? In this case, Ghost has something for you: its native Members feature. Invite your readers to become members of your blog, and provide them with exclusive content such as premium publications or paid newsletters. Since Ghost integrates with almost any other tool, you can also create member-only communities or add protected comments. Neither of these requires you to know how to code.
Getting started with memberships is as easy as setting up a new blog: simply create a new Ghost site, choose a theme, configure the memberships and that’s it. Ghost doesn’t take any transaction fees, meaning 100 percent of your readers’ contributions are paid directly to you. Plus they’re a verified partner of Stripe, an online payment processor for internet businesses. This makes taking payments secure and simple: all you have to do is open a Stripe account and connect it to Ghost.
Creating Your First Blog Post
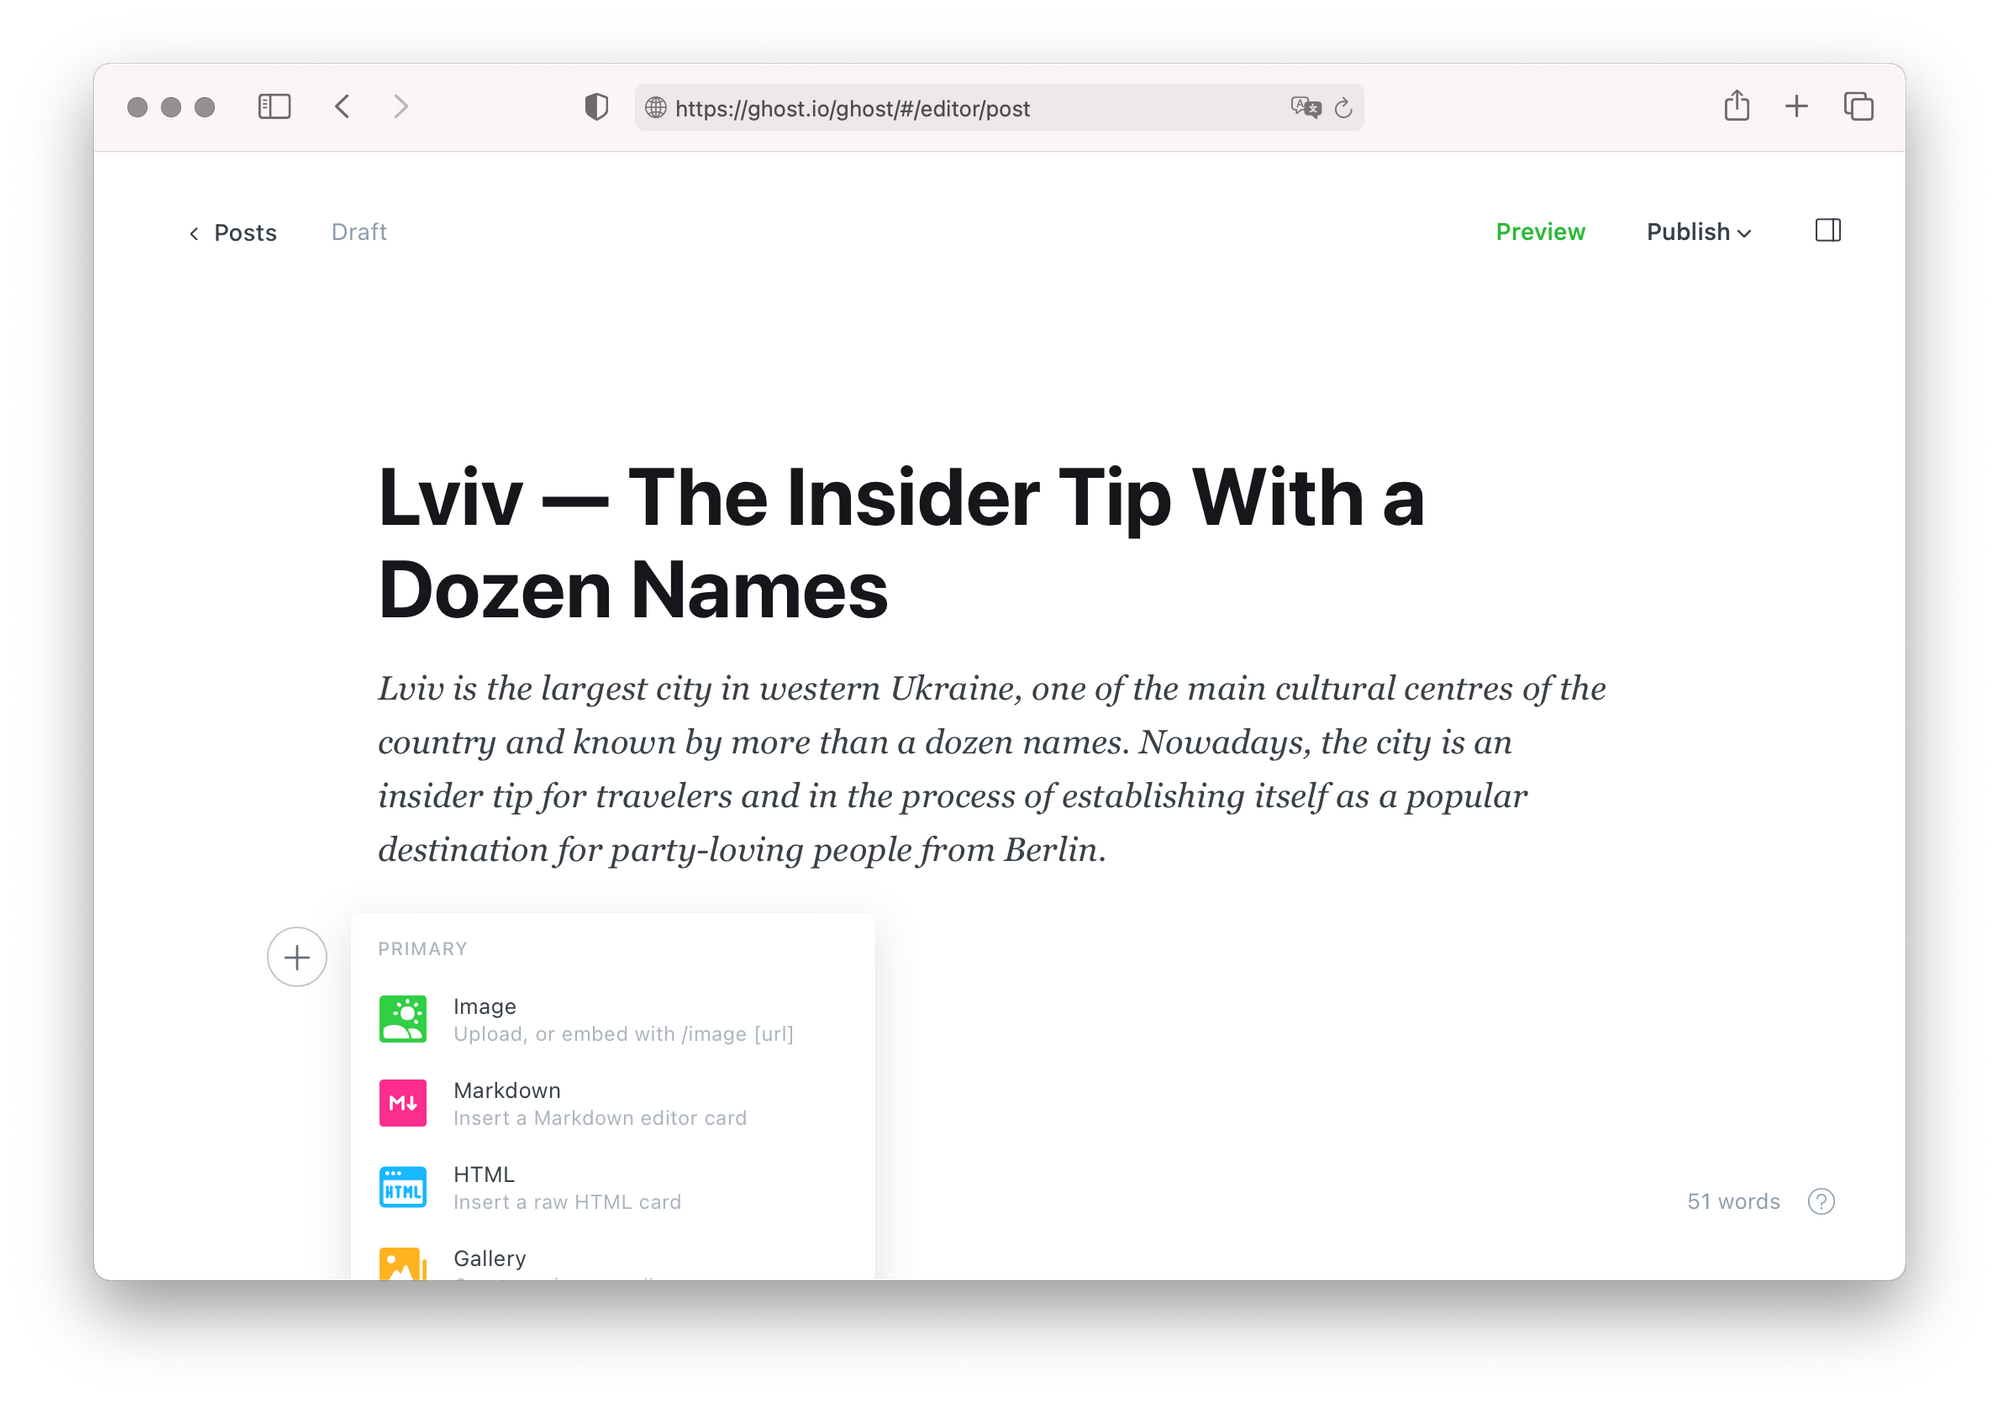
Ghost lets you switch between a visual editor or use Markdown to format your blog post. An editor widget lets you add images, or embed content from platforms like YouTube, Twitter, Instagram, Vimeo, Spotify, and more:
Once your post is ready for publishing, you can adjust its settings in the sidebar: upload an image, modify its URL, add tags and provide an excerpt. Additional options let you provide metadata for search engines, Twitter and Facebook, or customize the styling of your post’s header and footer. However, this is optional so leaving these settings blank is completely fine. Once you’re happy with everything, you can publish your blog post immediately or schedule it for later. The entire process is very streamlined and simple so that you can concentrate on what’s important: providing great content for your readers.
What Does It Cost?
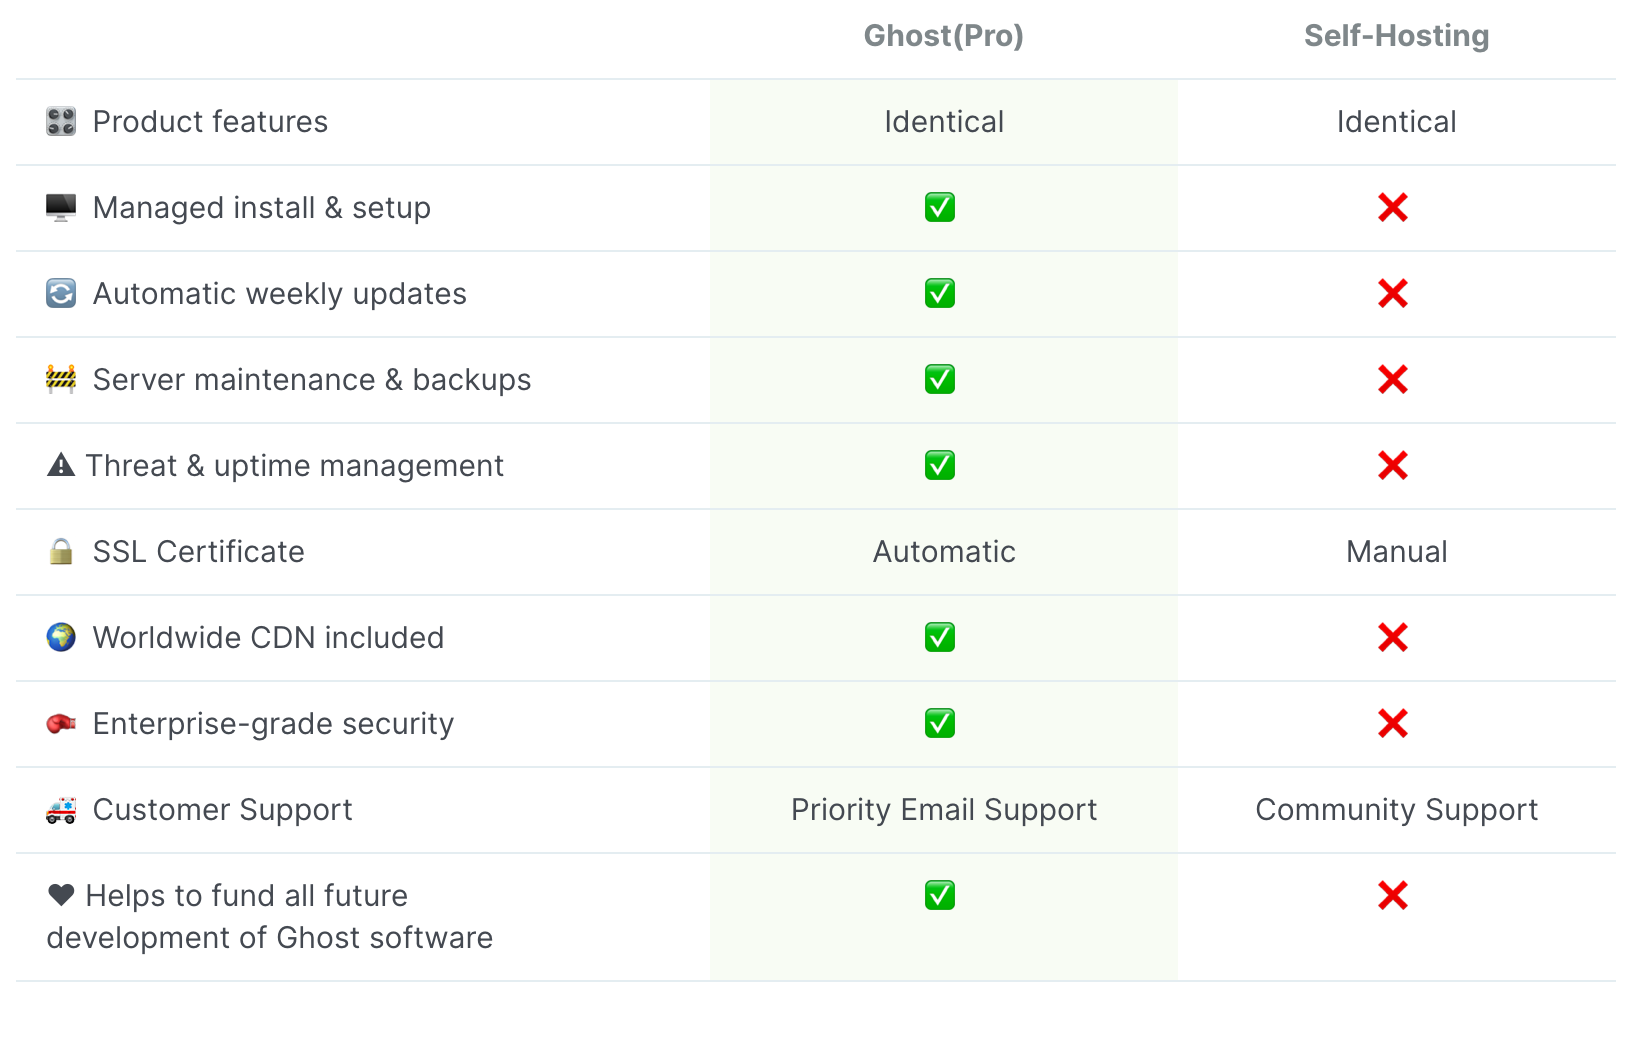
Ghost comes in two variants: a self-hosted version that is free to download and use, and a version hosted on Ghost’s servers. Both versions offer exactly the same product features; however, the self-hosted version requires you to perform the install and setup yourself. Also, Ghost doesn’t provide customer support for self-hosted installations, but you can use their community forums if you need help troubleshooting. Here’s a detailed comparison of both available versions:
For the hosted version, Ghost(Pro), you can choose between various plans, with yearly prices starting from $9/month.
Before you decide on a plan, you can try out the hosted version for free for 14 days. This gives you enough time to set up your blog and to get familiar with the ins and outs of the lightweight publishing platform. If needed, you can transition from the self-hosted version to Ghost(pro) and vice-versa at any time by exporting your data.
They provide an extensive resource section full of helpful tutorials and articles, addressing everything from how to set up your blog to technical questions.
How I Use Ghost as an Editor at Ulysses
At Ulysses, we added the ability to publish to Ghost in 2019, as the integration had been requested by many users. While developing this feature, we became increasingly convinced by Ghost’s simplicity and slickness. In the end, we moved our company blog to the minimalist platform — a decision we haven’t regretted. Since Ulysses fully integrates with Ghost, I can work entirely from within Ulysses’ editor when publishing posts to our company blog.
To get this to work, all I had to do was add my Ghost account to Ulysses in the app’s settings. After providing the blog’s URL and the account credentials, I was good to go.
Now to come up with a blog post, I’ll simply create a new sheet in Ulysses and start typing. A title in Ulysses (marked by a single hashtag) will become a title in the final blog post. Two hashtags mark something as a level two heading in Ulysses’ editor and will become a section heading in the published blog post. If I want to insert an image, typing (img) in Ulysses’ editor will open a popover where I can select a file from my hard drive or insert an image via URL. I can also provide an image caption which will later be displayed in my blog post.
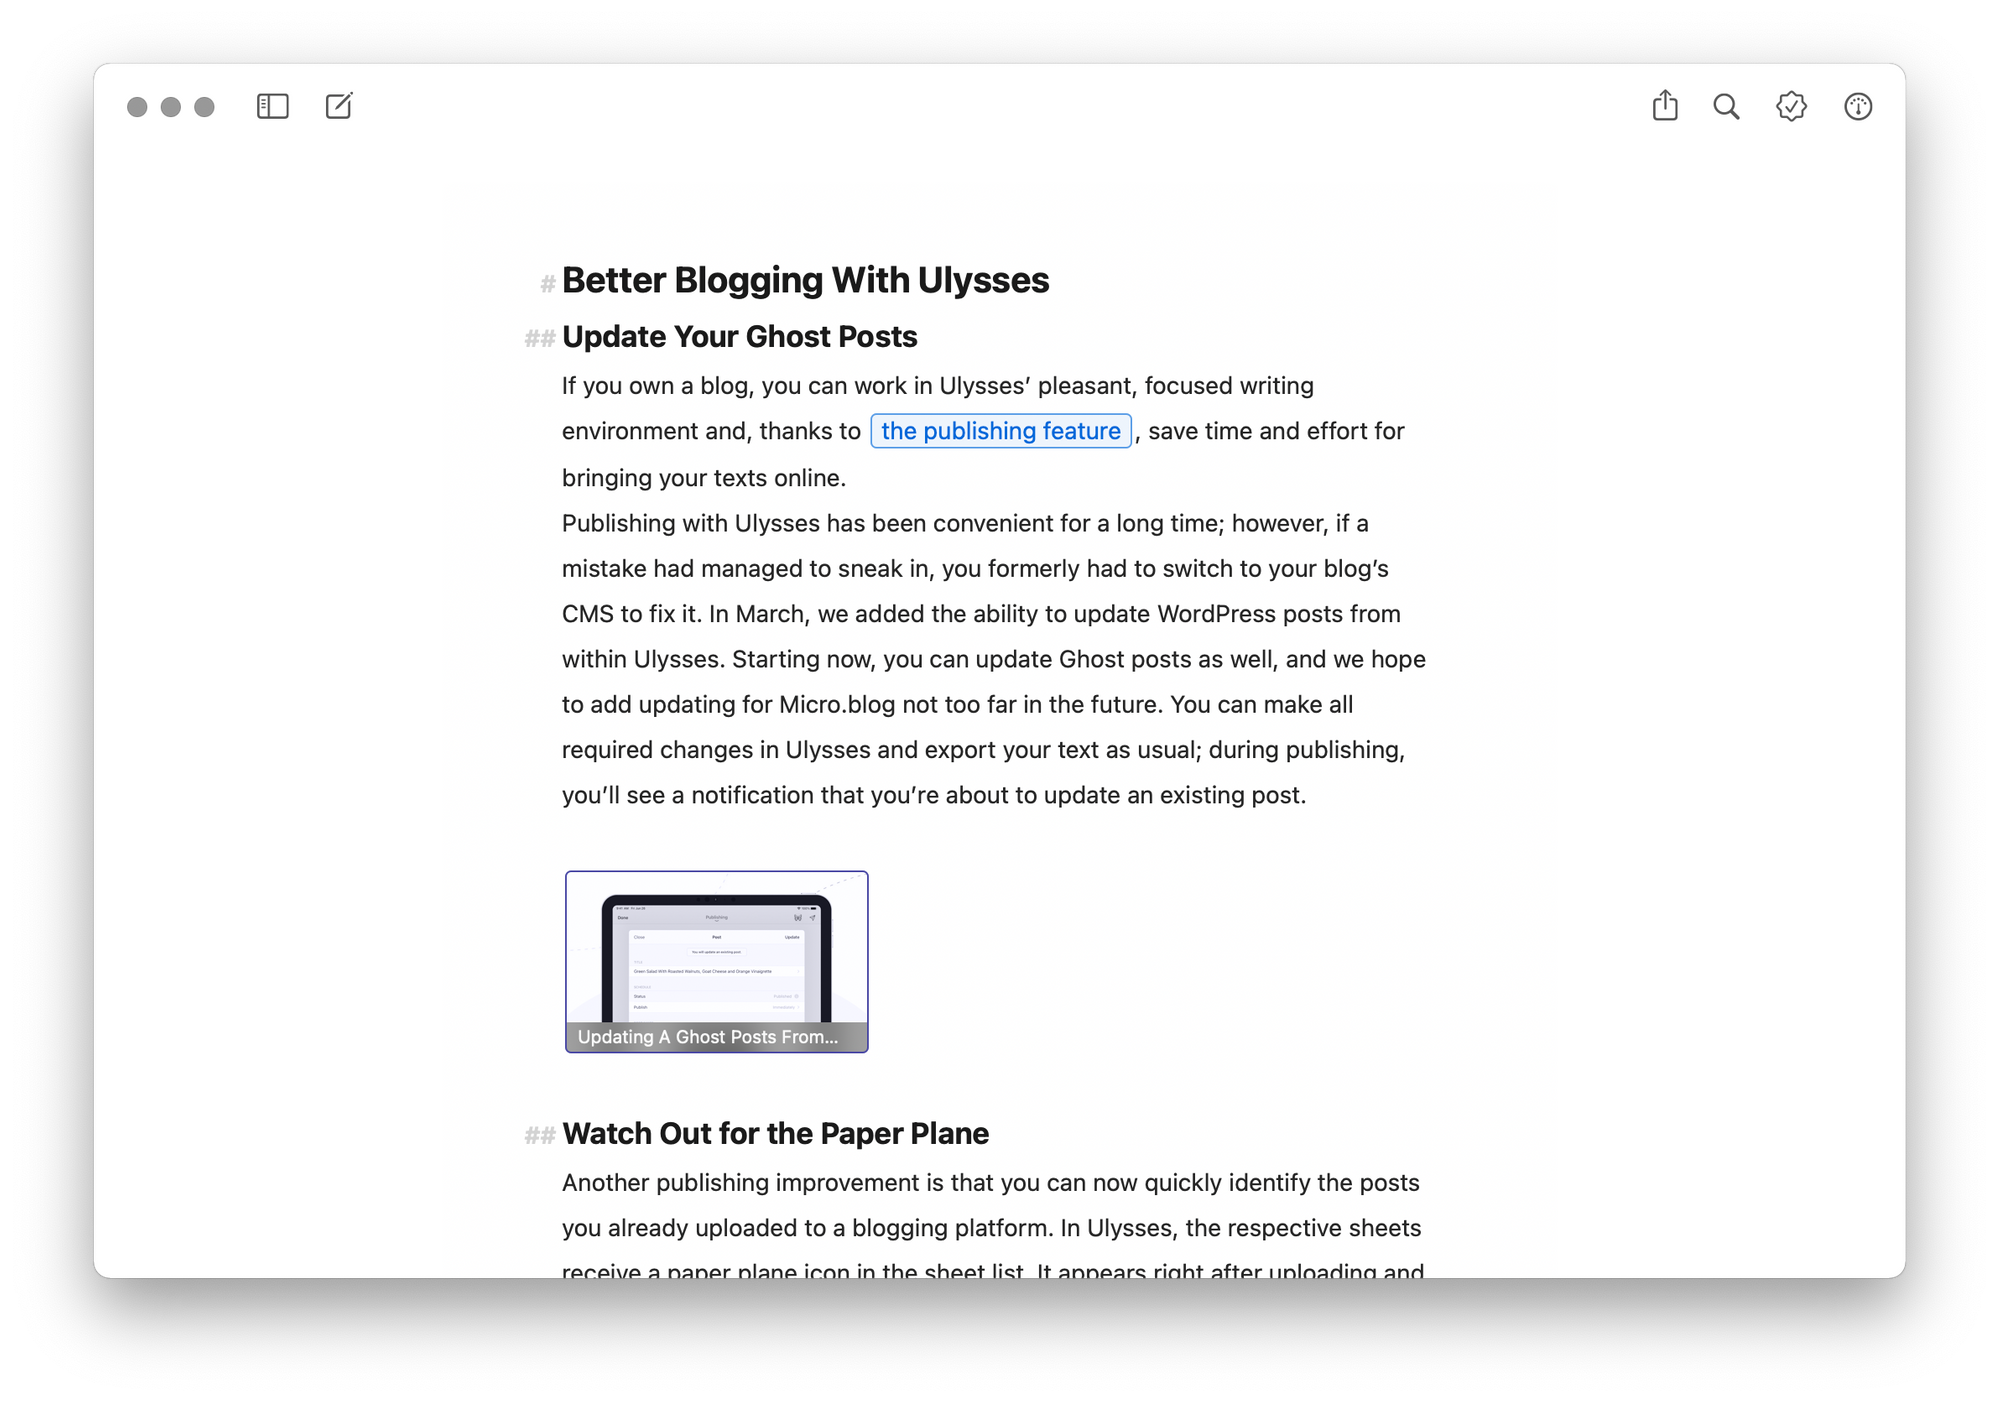
Through Ulysses’ dashboard, it’s possible to manage my post’s metadata: adding a keyword to my sheet in Ulysses will result in a tag once the post has been published (provided I have previously created the tag via Ghost’s dashboard). If I attach an image to the sheet in Ulysses, it will later become the post’s featured image; and a note in Ulysses’ dashboard will become the post’s excerpt.
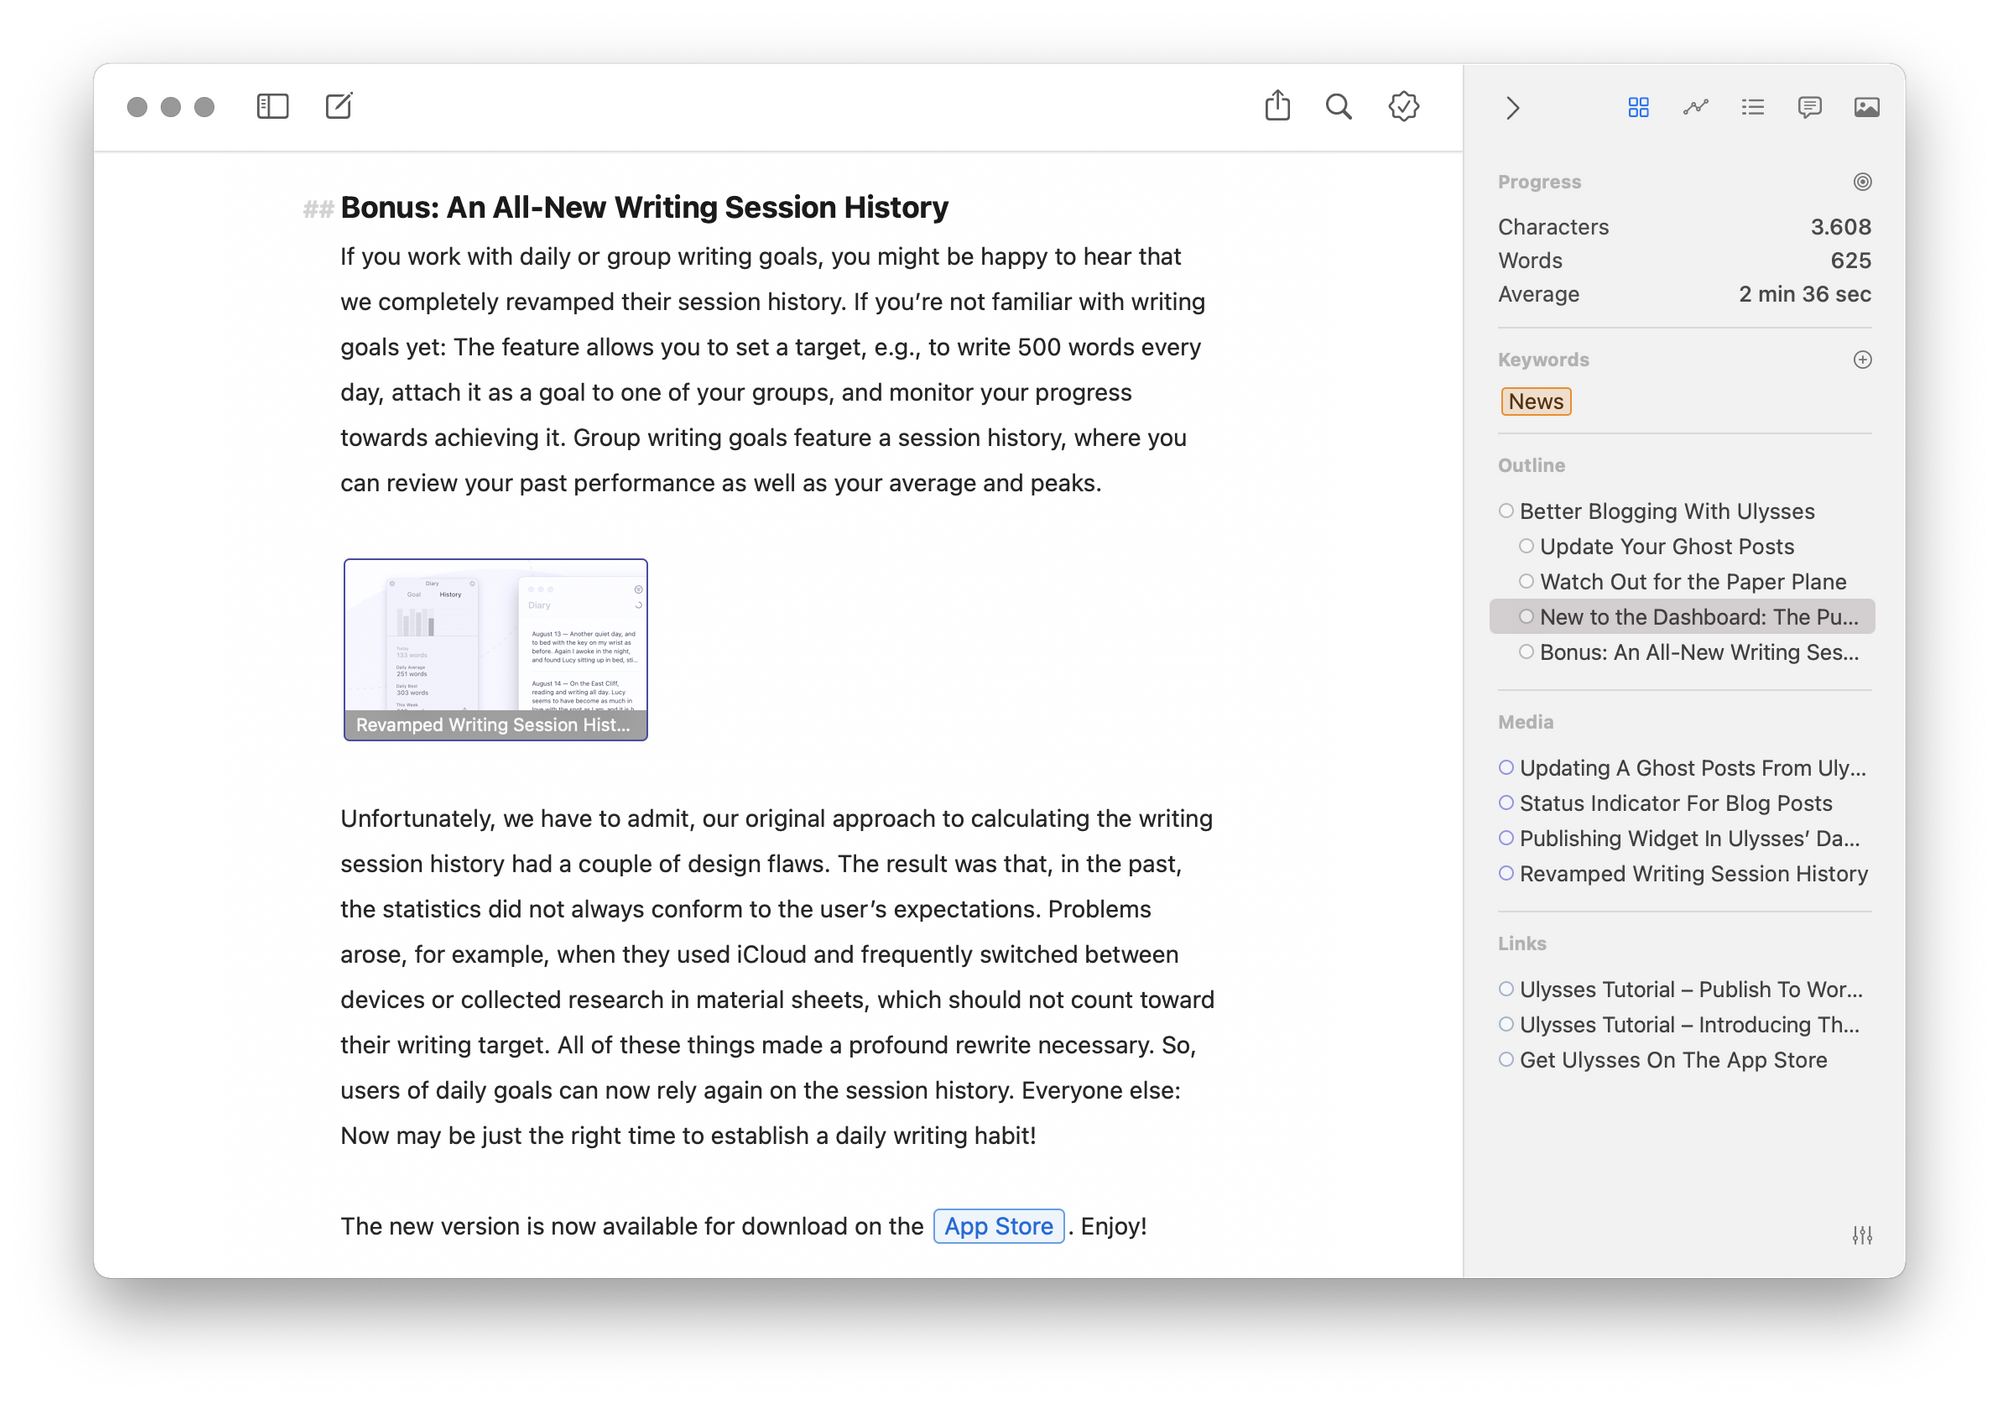
Once I’m done writing the blog post, I’ll simply hit the export button and choose “Publishing” as export format. If I’m happy with the preview, I can select “Publish” and Ulysses will show me my post’s metadata. Here, I can tell Ulysses to either immediately publish the blog post or schedule it for later. By opening the post’s details, I can also view and adjust the featured image and excerpt, provide a custom post URL and manage the tags. Now all I have to do is click “Publish” and my blog post is online:
The whole process is very convenient. I can draft, write, edit and organize my blog posts in Ulysses, an app that’s optimized for writing, and publish to our company’s Ghost blog in a snap.
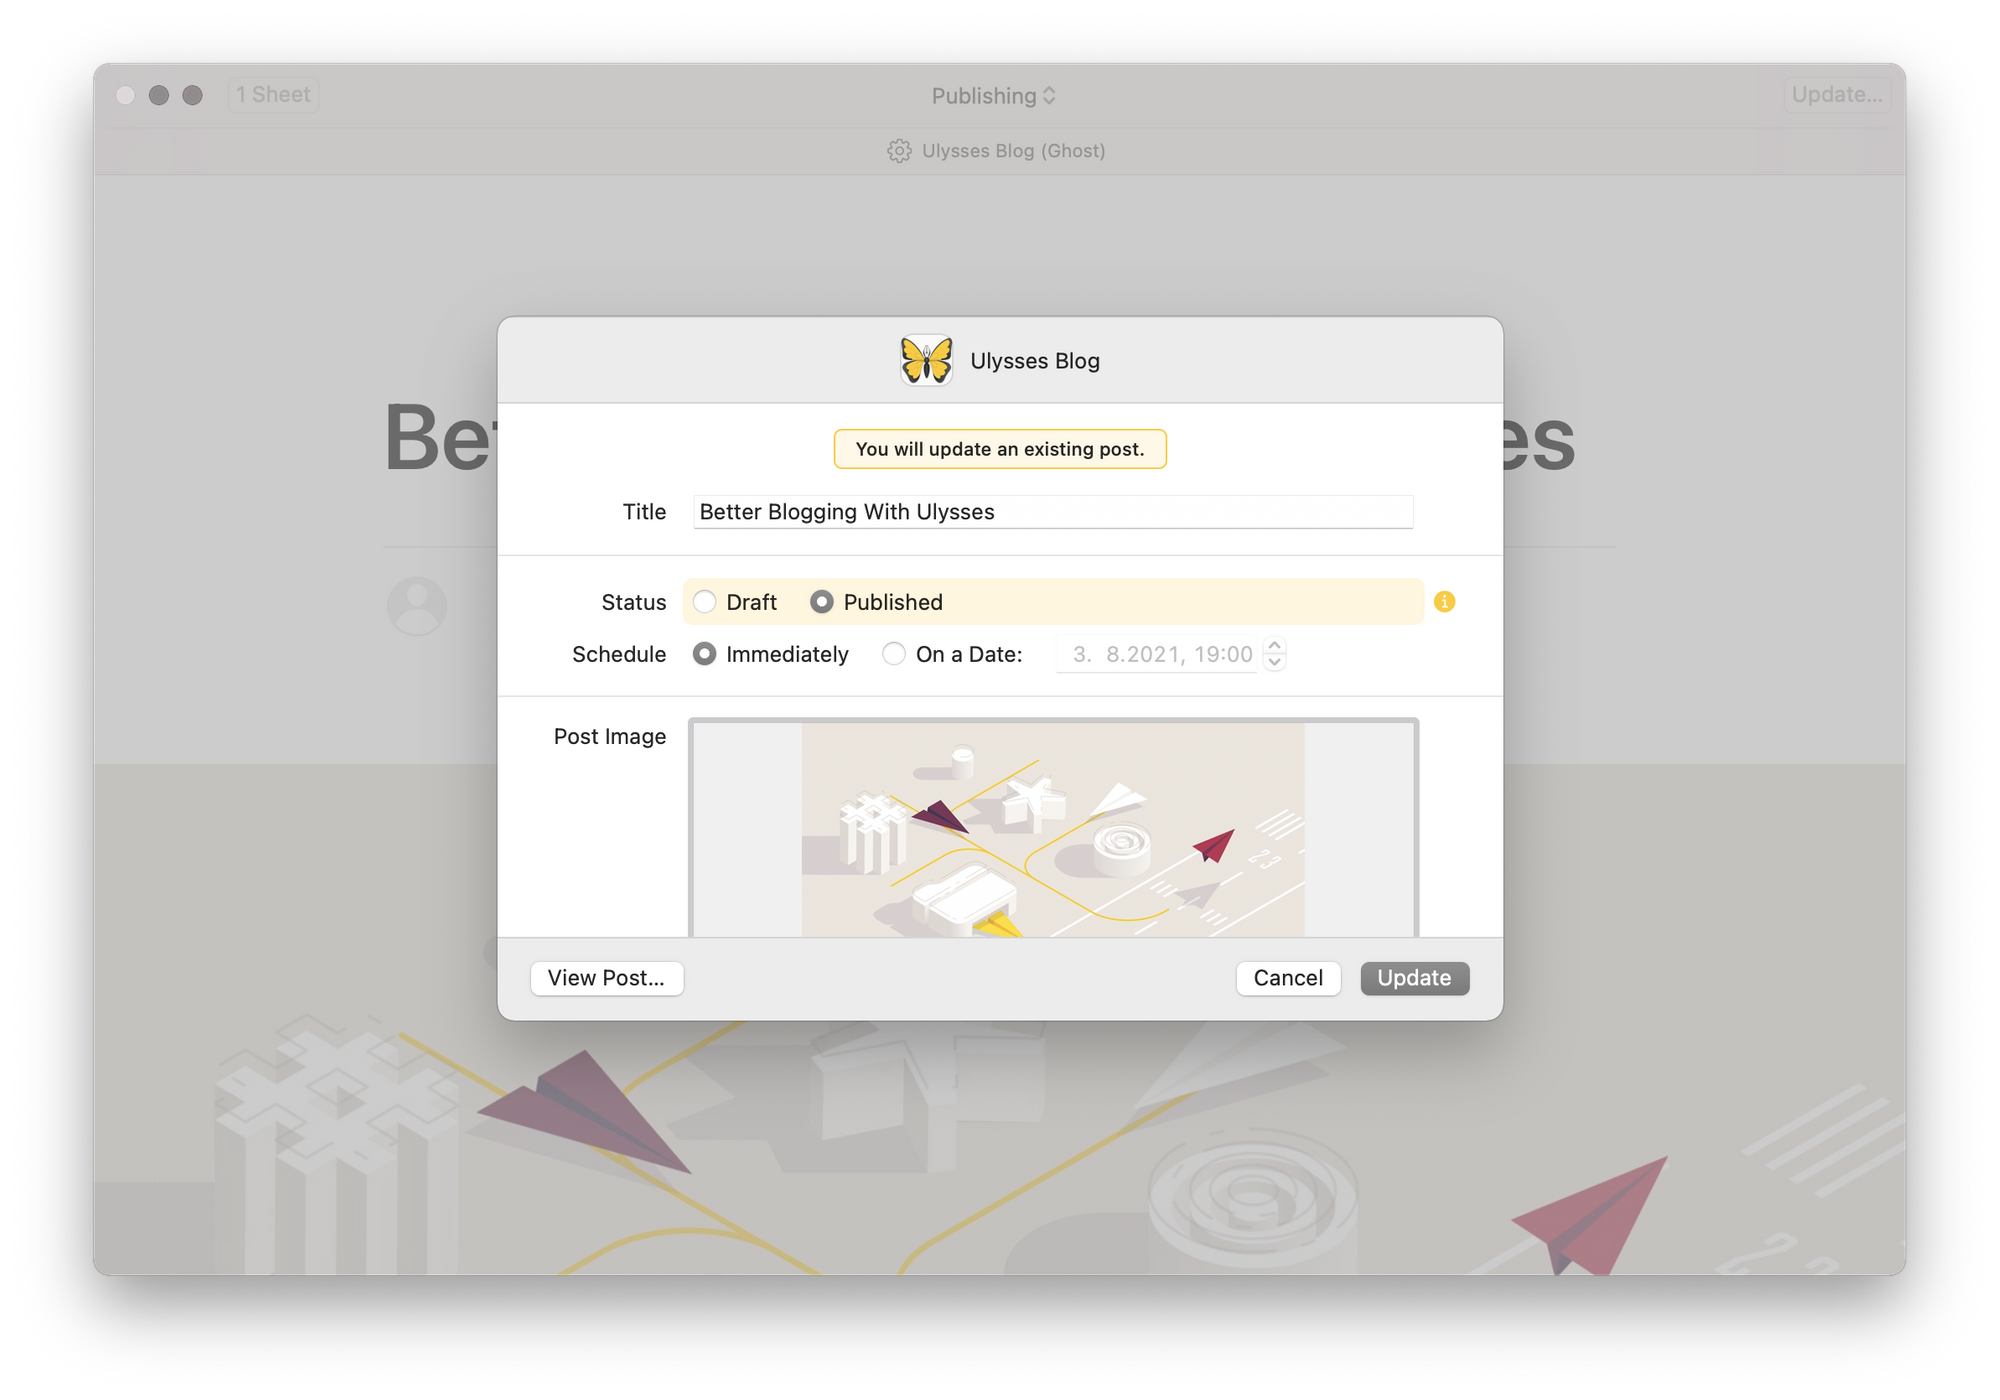
Last but not least, I can also update blog posts that I have published from within Ulysses. To do so, I’ll simply adjust the blog post, hit Publish again, and Ulysses will automatically recognize that I’m about to update the post.
For a detailed step-by-step tutorial, hop over to our knowledge base article on how to set up your Ghost blog in Ulysses in no time.
So if you’re now interested in giving Ghost a try, you can sign up for the 14-day free trial on their website. Happy blogging!